How to Design a Solar LED Street Light System — 2026 Technical Guide
Shinesun's editorial team writes about solar lighting based on our manufacturing, installation, and field-service experience across India.
Designing a solar LED street light system is a sizing exercise: the LED load drives battery capacity, battery capacity drives panel size, and the operating environment sets the safety margins. Get the math right and the system runs reliably for years. Get it wrong and the fixture either fails early or doesn't run a full night.
Step 1: Calculate the daily energy load
Start with the LED wattage and the operating hours.
Daily load (Wh) = LED wattage × operating hours × sensor duty factor
For a 40W LED running 12 hours per night with a motion sensor (typically ~50% average duty cycle): 40 × 12 × 0.5 = 240 Wh/day.
For continuous full brightness (no sensor): 40 × 12 × 1.0 = 480 Wh/day.
Step 2: Size the battery
Battery capacity needs to cover the daily load plus reserve for cloudy days.
Battery capacity (Wh) = Daily load × Autonomy days ÷ Depth of Discharge
Recommended autonomy: 2-3 days for most Indian regions, 3-4 days for high-monsoon or Northeast sites.
Recommended Depth of Discharge (DoD): 80% for LiFePO4, 50% for lead-acid.
For a 40W LED with motion sensor in a 2-day-autonomy LiFePO4 system: 240 × 2 ÷ 0.8 = 600 Wh battery.
Step 3: Size the solar panel
Panel must replenish the daily load within the available peak-sun hours (PSH).
Panel wattage = Daily load ÷ (Peak sun hours × Charging efficiency)
PSH in India: 4.5-5.5 hours/day annual average (lower in Northeast, higher in Rajasthan/Gujarat).
Charging efficiency: ~0.75-0.85 accounting for panel temperature derating, controller losses, and cabling.
For 240 Wh/day in a 4.5 PSH region: 240 ÷ (4.5 × 0.8) = ~70W panel. Round up to 80-100W for safety margin.
Step 4: Choose the charge controller
- PWM controllers — cheap, fine for small fixtures up to ~30W where panel/battery voltages match closely.
- MPPT controllers — extract 20-30% more energy in cloudy or off-MPP conditions. Worth the cost premium for any fixture above 30W or installations in high-cloud regions.
Step 5: Select the LED and optics
Lumens per watt has improved significantly — current commercial LED packages deliver 130-160 lm/W. Beam pattern matters as much as raw output:
- Wide beam (Type II/III) — for street lighting where the throw is along the road axis.
- Narrow beam (Type V) — for area lighting (parking, courtyards) where uniform downward illumination is needed.
CCT (colour temperature): 4000-5000K for streets and parking; 3000K for residential/garden where warmer light is preferred.
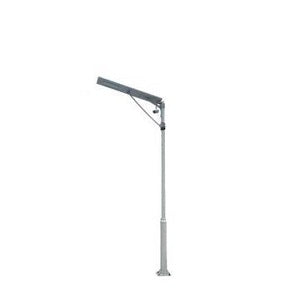
Step 6: Choose mounting and pole specifications
Pole height drives the lit area and recommended wattage (see how to choose for the height-to-wattage rule of thumb). Pole material is typically galvanised steel, hot-dip recommended for coastal/humid regions.
Step 7: Validate with margin
Add 15-20% margin to panel and battery sizing for real-world conditions: panel soiling, battery degradation over time, cabling losses, ambient temperature derating. The few percent extra cost at install is much cheaper than retrofitting a failed system.
Off-the-shelf vs custom-sized
For most residential and small-commercial installations, an off-the-shelf fixture like the Solar Bat 40W covers the design exercise — it's pre-sized for typical use. For larger or unusual installations (high pole heights, specific lumen targets, harsh environments), contact the Shinesun team with your site details and we'll size each component for your requirement.