Anatomy of a Solar Street Light (2026)
Shinesun's editorial team writes about solar lighting based on our manufacturing, installation, and field-service experience across India.
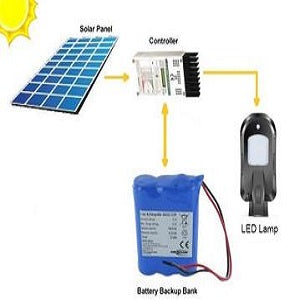
A 2026 all-in-one solar street light packs a complete power-and-lighting system into a single sealed enclosure at the top of a pole. This guide takes you through the physical layout — what's where, what each part does, and how the design has evolved from earlier split-component fixtures.
The all-in-one form factor
Modern fixtures integrate all major components into a single housing mounted at the top of the pole:
- Top surface — solar panel, angled for optimal sun exposure
- Front face (or underside) — LED array and motion sensor
- Interior cavity — battery pack and controller electronics
- Mounting interface — bracket connecting to pole top
This is the dominant 2026 design. See best all-in-one solar street lights.
Top down — the solar panel
The panel is on the top surface of the fixture, typically angled 15-25° for optimal year-round sun exposure in India. Key features:
- Monocrystalline silicon cells arranged in a series-parallel matrix
- Tempered glass cover for impact and weather resistance
- Anti-reflective coating for improved low-angle performance
- EVA encapsulant bonding the cells
- Aluminium frame with sealed edges
The panel's output goes through an internal cable to the controller below.
Inside the housing — battery and electronics
Below the panel and behind the LED array sits the brain of the system:
Battery pack
Typically a sealed LiFePO4 pack (4 cells in series for 12.8V nominal). Mounted with vibration-damping mounts. Connected to the controller via short heavy-gauge wiring.
Charge controller / driver board
A single PCB combining:
- MPPT charge converter (above 30W)
- Battery management circuit
- LED driver
- LDR and motion sensor interface
- Microcontroller running the operating logic
Quality fixtures use conformal-coated PCBs to resist humidity and temperature swings.
Wiring
All internal wiring is factory-completed and tested. No field wiring needed in a true all-in-one fixture.
The light-producing face
The LED array sits on the underside or front face of the fixture, oriented to throw light down to the ground:
- LED chips — typically arranged in a rectangular matrix; chip count varies by wattage
- Lens / diffuser — shapes the beam pattern (usually wide for street lighting)
- Heat sink — usually integrated into the housing body; metal mass dissipates LED heat
- Sealed cover — clear polycarbonate or glass, protecting LEDs from weather
The motion sensor
The sensor is positioned to scan the ground area below the fixture:
- PIR sensors have a clear dome lens, slightly recessed into the housing
- Microwave radar sensors sit behind a non-metallic cover; less visible externally
- The LDR is usually a small light-sensitive area on the housing, exposed to ambient light
The mounting bracket
At the back of the housing, a bracket assembly connects to the pole:
- Pole-side bracket — mounts to the pole top using a side-arm or vertical mount
- Fixture-side mount — typically allows angular adjustment (tilt and rotation)
- Stainless steel hardware — for outdoor corrosion resistance
Adjustment lets installers fine-tune the panel angle and LED aim post-installation.
The housing itself
The enclosure is typically:
- Die-cast aluminium — strong, dissipates heat, long lifespan in Indian conditions
- Powder-coated — UV-resistant finish in standard colours (grey, black, white)
- IP66 rated — dust-tight, monsoon-rated water protection
- Silicone gasketing — sealed joints between major panels
- Service-accessible — typically a battery service hatch with security screws
What's evolved since older designs
| Component | Older split design | Modern all-in-one |
|---|---|---|
| Panel | Separate, sometimes lower-mounted | Top of housing |
| Battery | In ground-level box (theft target) | Inside housing, pole-top |
| LED head | Separately mounted, fixed angle | Integrated, adjustable |
| Wiring | Field-installed cabling between units | Factory-completed inside one box |
| Theft risk | Lead-acid batteries had scrap value | Pole-top sealed unit, low theft target |
| Install time | 2-4 hours per pole | Under 1 hour per pole |
Why this matters when buying
- Inspect access — quality fixtures have service-accessible battery compartments for end-of-life replacement
- Verify housing material — die-cast aluminium > ABS plastic for longevity
- Check sensor visibility — sensors must have clear sight lines to the ground area
- Confirm bracket adjustability — fixed mounts limit installation flexibility
Shinesun all-in-one anatomy
Shinesun all-in-one fixtures (Solar Bat range and similar) follow this standard anatomy: monocrystalline panel on top, LiFePO4 battery and MPPT controller inside, LED array with PIR sensor on the underside, IP66 die-cast aluminium housing with adjustable mounting bracket. For specific product anatomy or service questions, see product pages or contact the team.